Customer Match is one of the most powerful — and most overlooked — settings in Shopify's Google & YouTube app. Here's exactly how to turn it on and what happens next in Google Ads.
If you're running Google Ads from your Shopify store, there's one setting most merchants miss: Customer Match. It's buried inside the Google & YouTube app, takes about 30 seconds to turn on, and it quietly makes every campaign you run smarter.
Here's what it does and how to set it up.
Why bother?
Customer Match sends your Shopify customer data — emails, purchase history, segments — directly into Google Ads as audience lists. Google then uses this data in two ways:
- Smarter Smart Bidding & PMax — even if you never actively target the list, just having it in your account improves how Google's AI bids. It's one of the strongest signals you can give PMax. Google confirmed that advertisers who apply Customer Match list signals see on average a 5.3% conversion uplift.
- Direct targeting & exclusions — retarget past buyers, exclude recent purchasers from prospecting, or find new customers who look like your best ones.
What you need first
Your Shopify store needs the Google & YouTube app installed and connected to a Google Ads account. If you're already running Google Shopping or PMax campaigns, you almost certainly have this. Check under Apps → Google & YouTube in your Shopify admin.
Step 1 — Open the Customer Match setup
In your Shopify admin, go to Apps, open the Google & YouTube app, and click into its Settings. That's where your Google Ads connection lives — scroll down to the "Customer match" section. It shows "1 of 2 tasks completed" if your Google Ads account is already connected.
Click into Customer Match and hit Turn on.
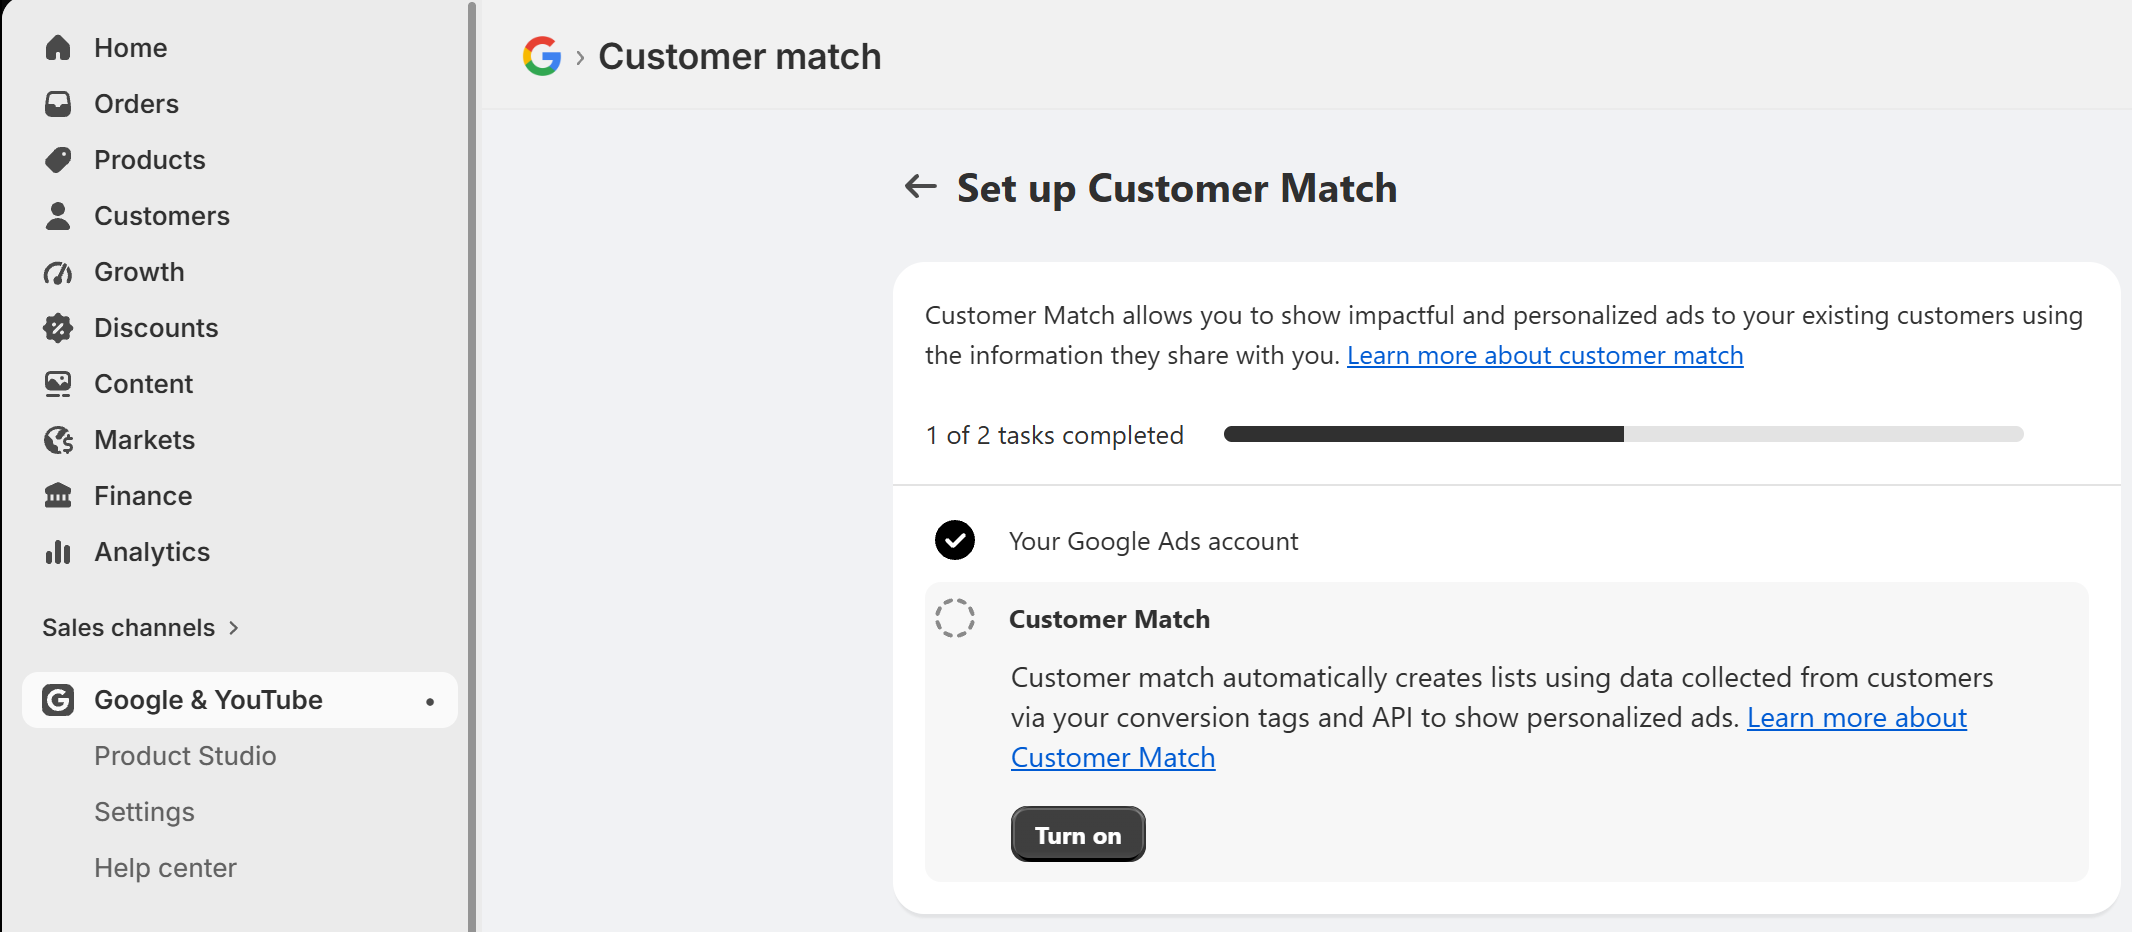
Step 2 — Confirm it's active
Once enabled, both tasks show green checkmarks — "Your Google Ads account" and "Customer Match". You'll see two buttons: Go to Google Ads and Turn off. That's it on the Shopify side. Customer Match is now live.
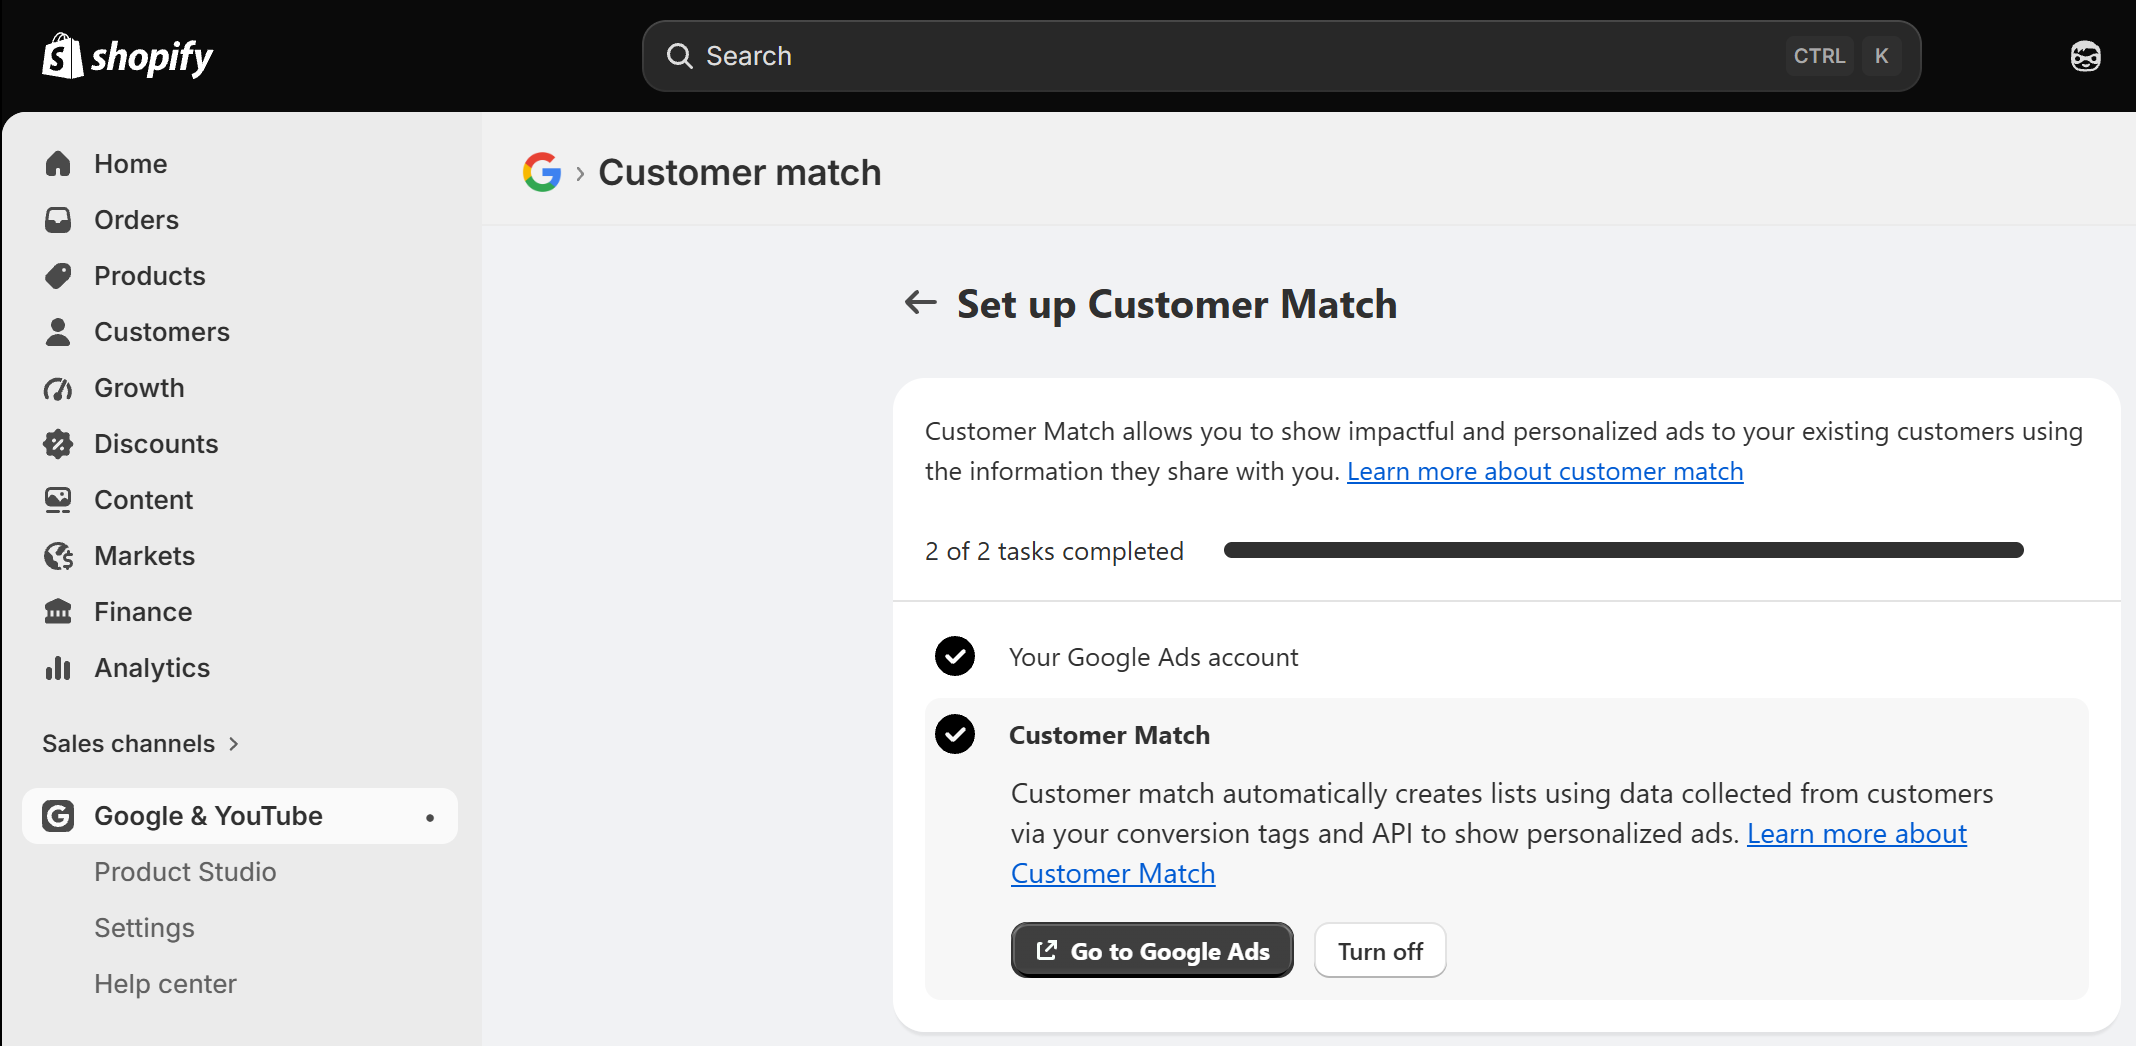
Hit Go to Google Ads and move on to the next step in this guide.
Step 3 — Create a customer list in Google Ads
A quick note before you start: on every screen in the Google Ads flow below, the default selections are fine to leave as-is. It's pretty intuitive — mostly you're just clicking Next or Continue. Only change something if you have a specific reason to.
Now head to your Google Ads account. Go to Tools → Shared library → Audience manager and click + Customer list.
Under "Choose a data source", select Use an existing connection — you'll see Shopify (yourstore.com) already listed. Select it.
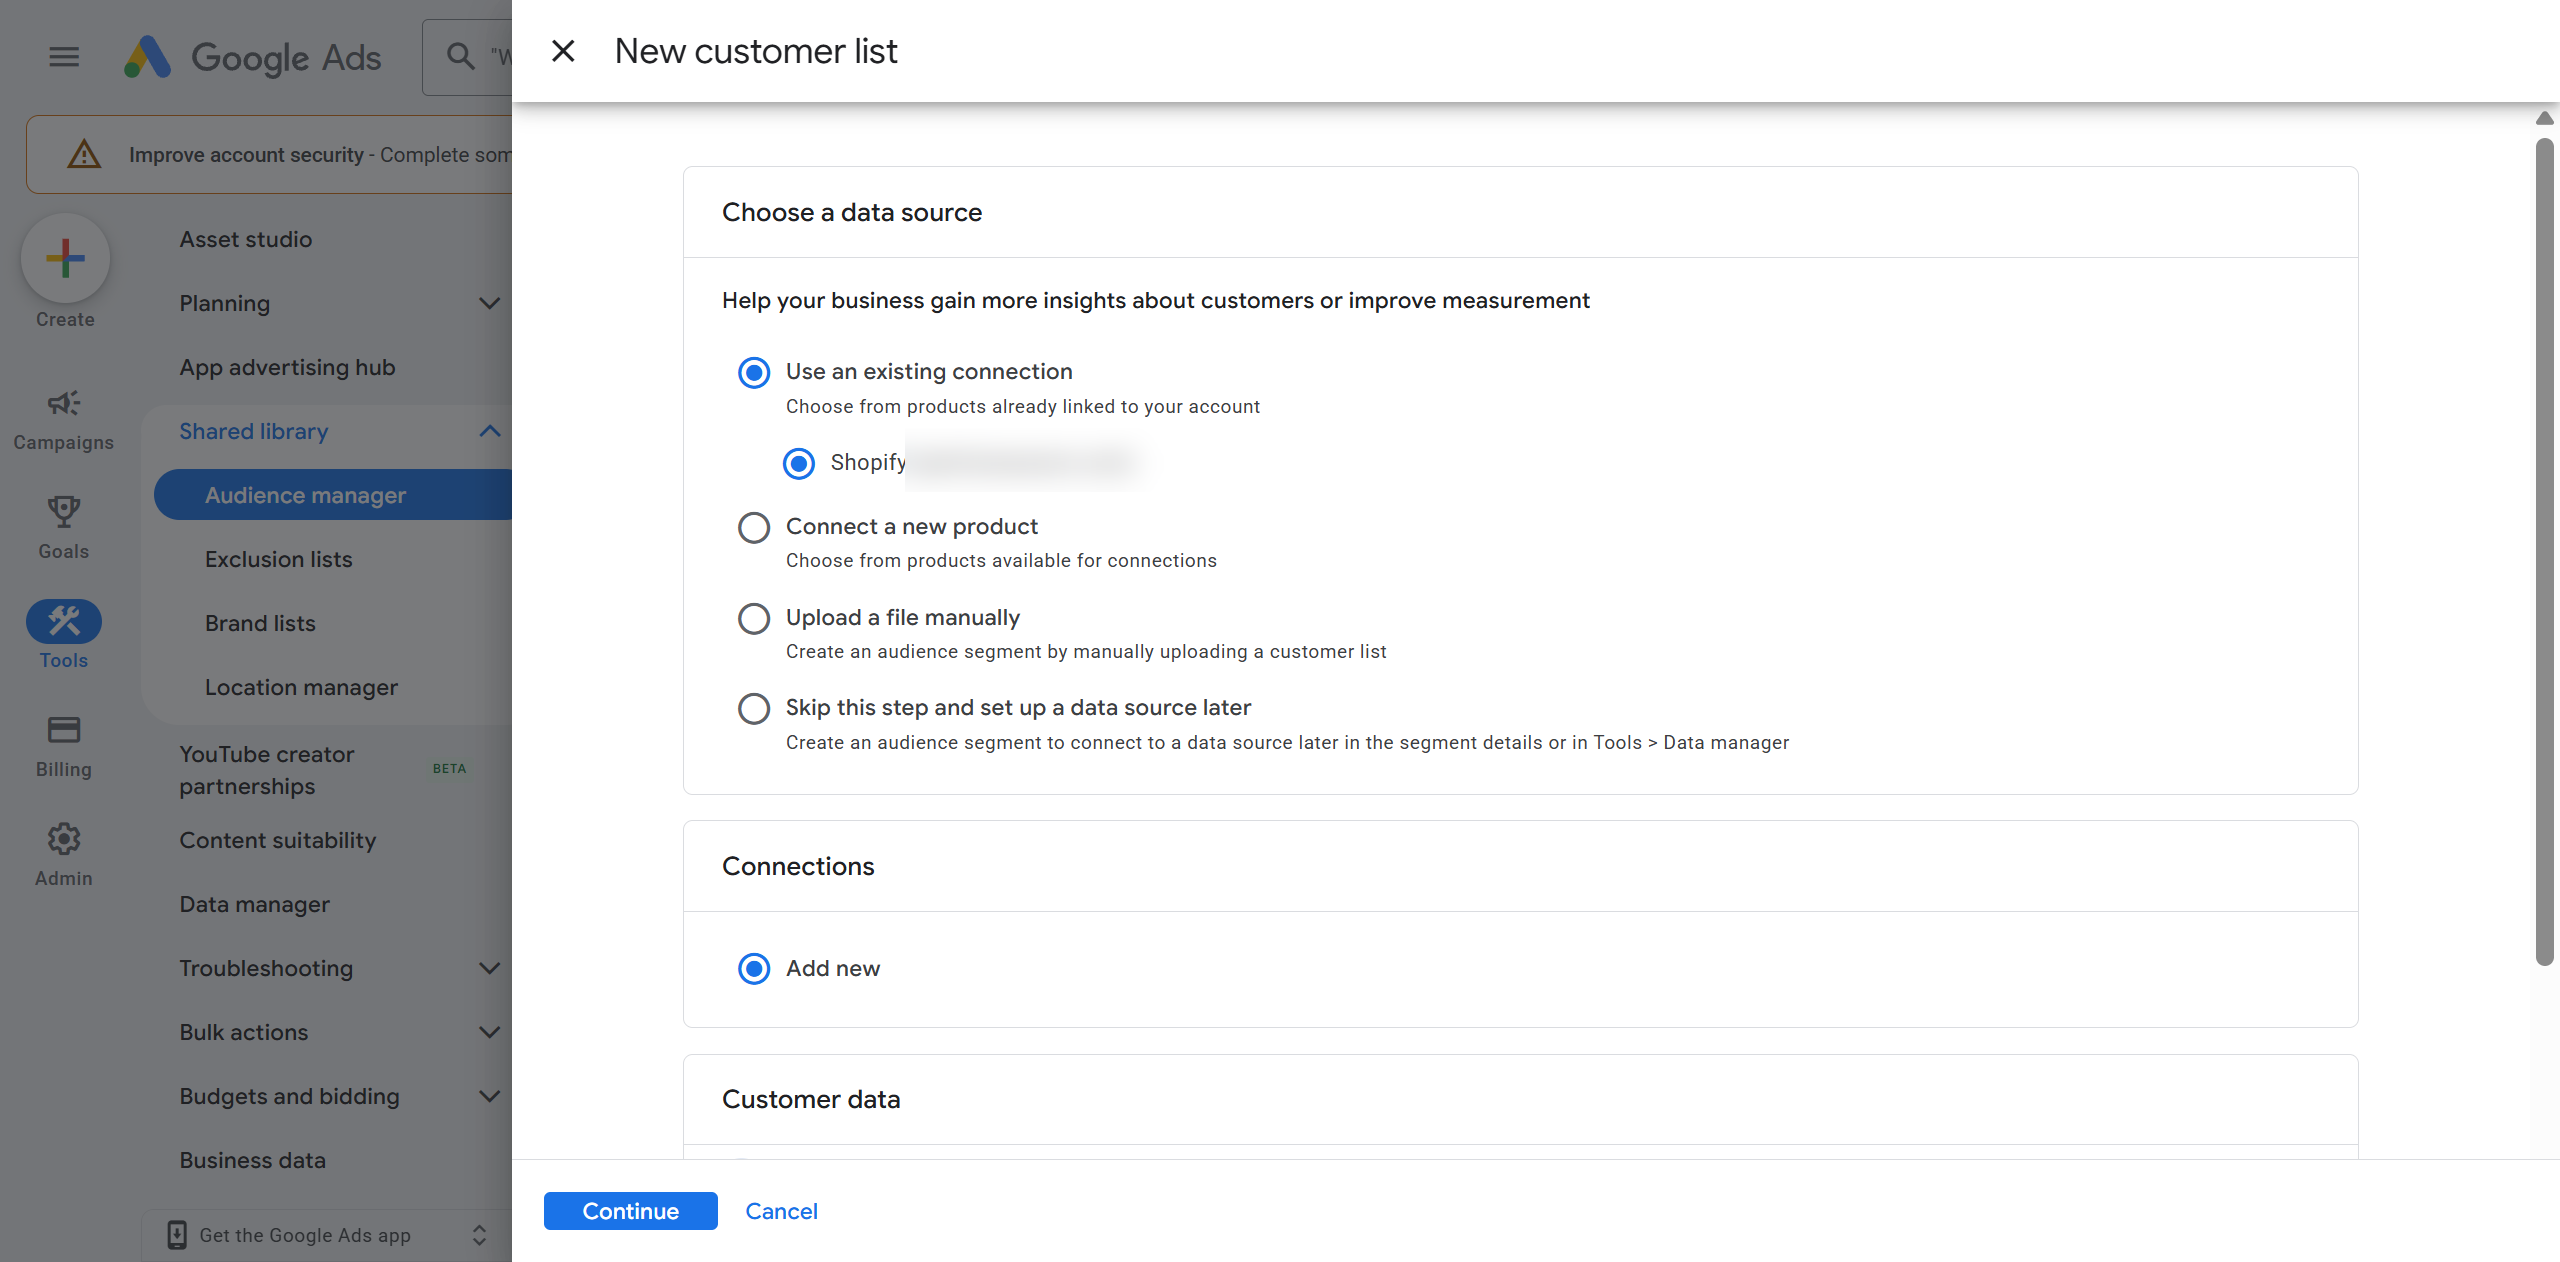
Step 4 — Choose your Shopify segments
Google will show you all your Shopify customer segments to import. You'll see segments like:
- Customers who haven't purchased
- Customers who have purchased more than once
- Abandoned checkouts in the last 30 days
- Email subscribers
- Customers who have purchased at least once
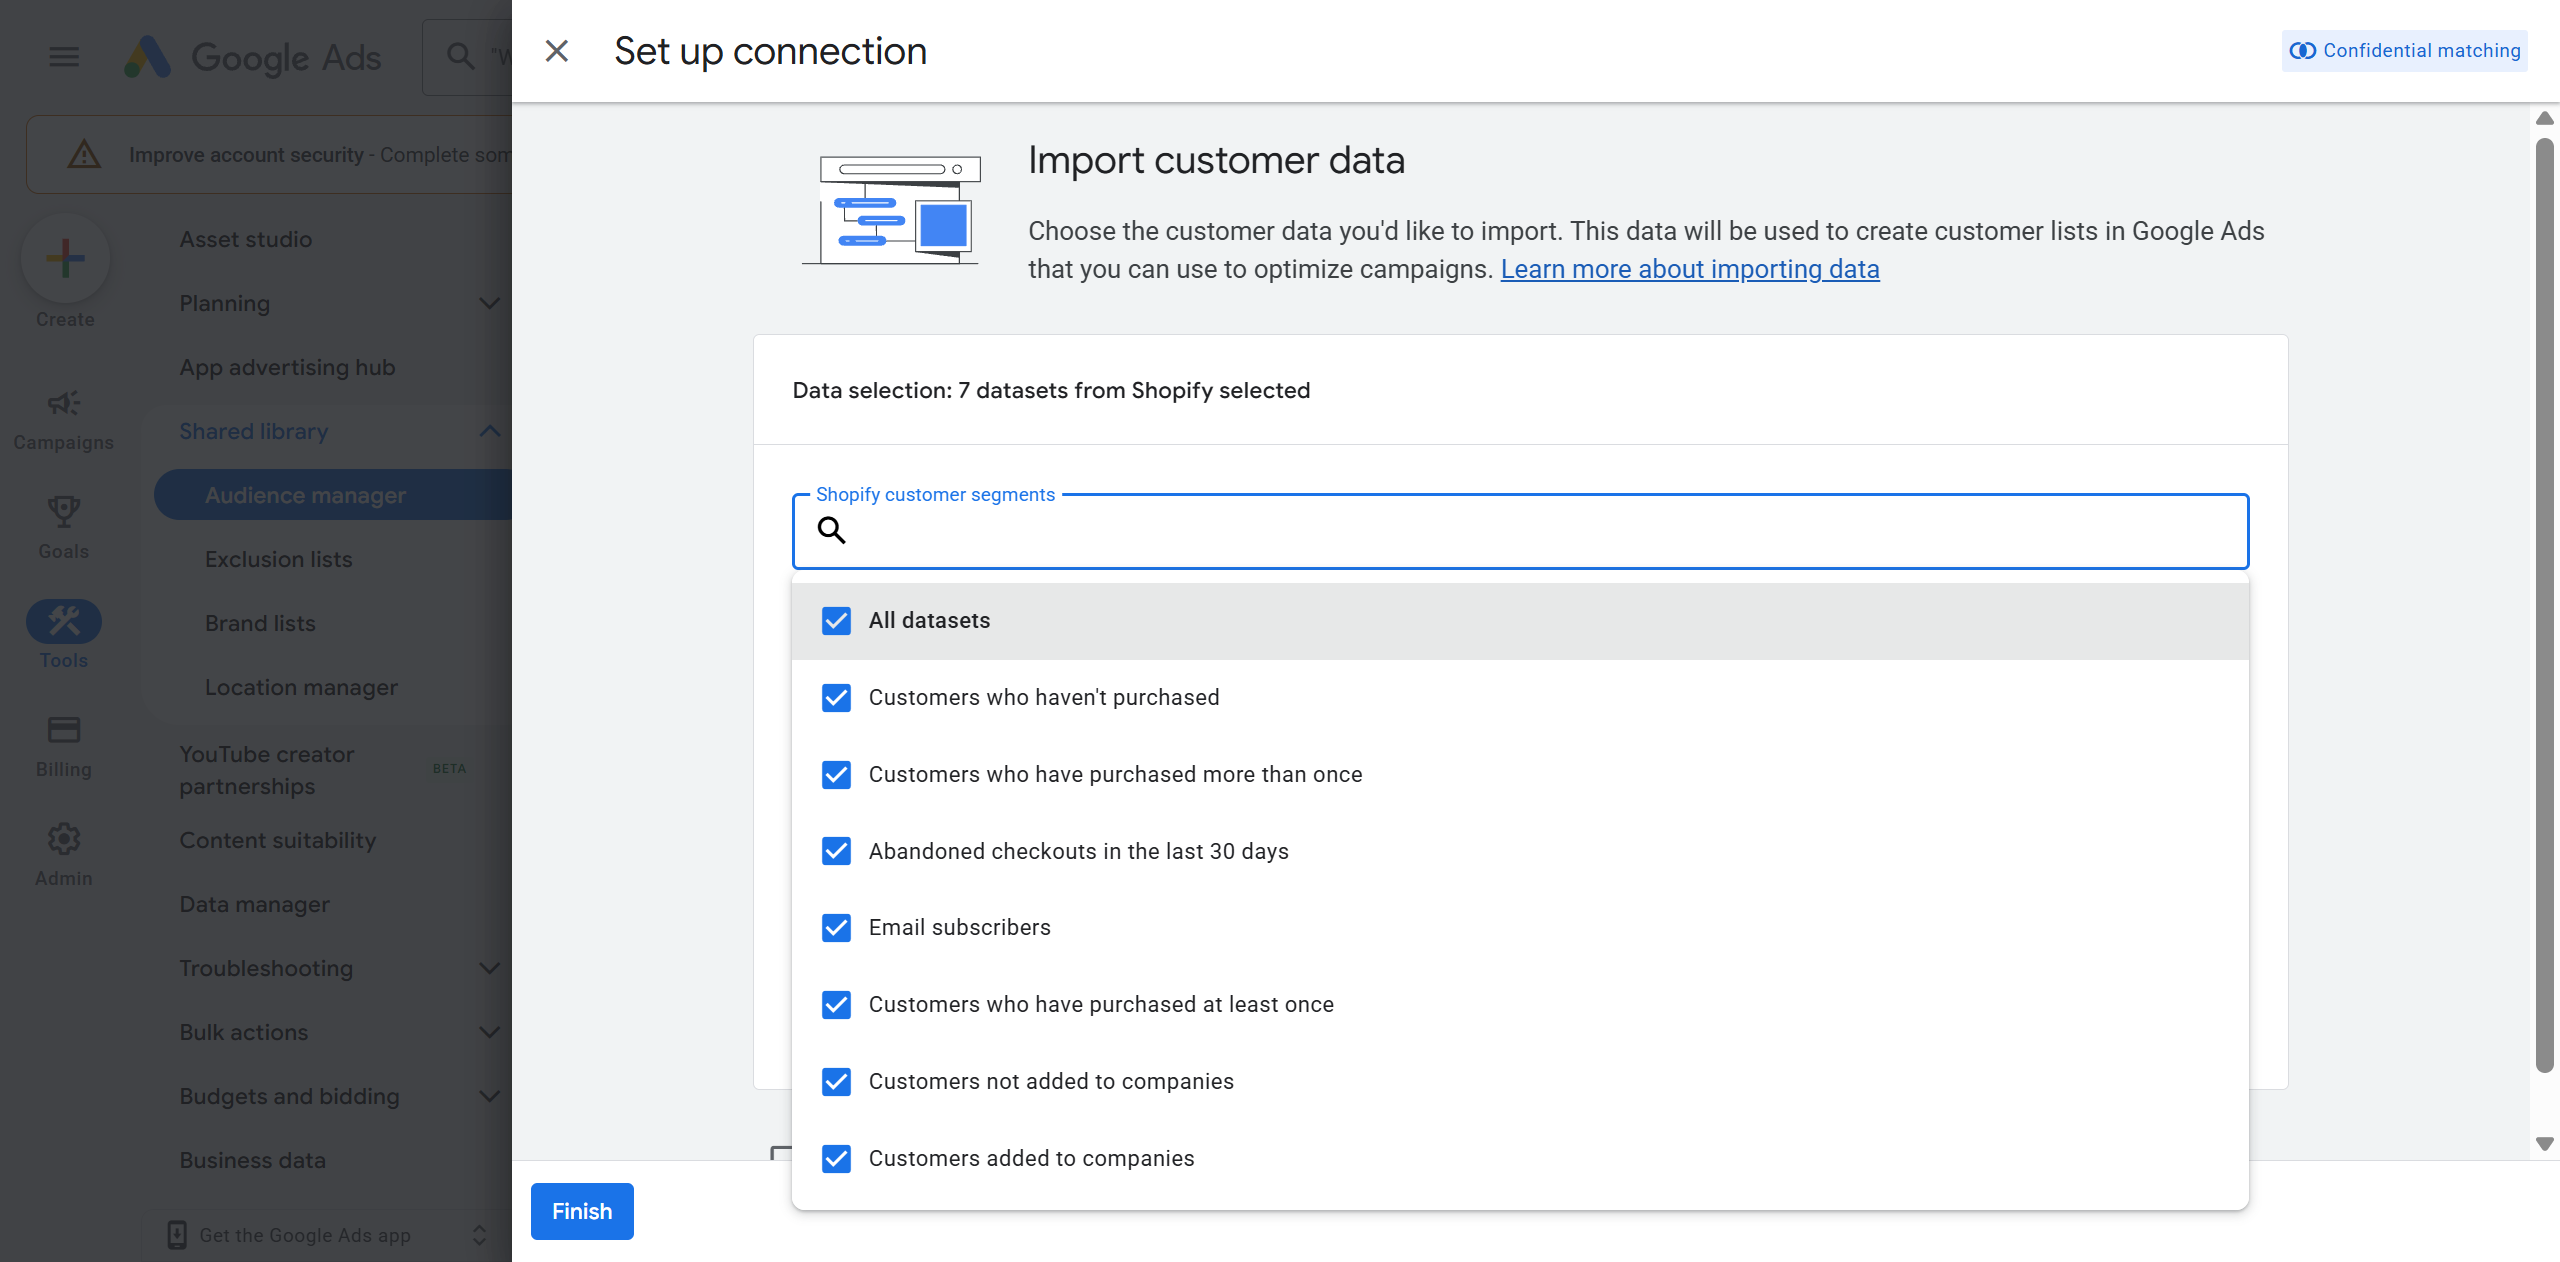
All are pre-selected by default, and that's the right call for most stores — just leave them as they are. Deselect any you don't need, but when in doubt, leave everything checked and click Finish.
Step 5 — Set customer types (don't skip this)
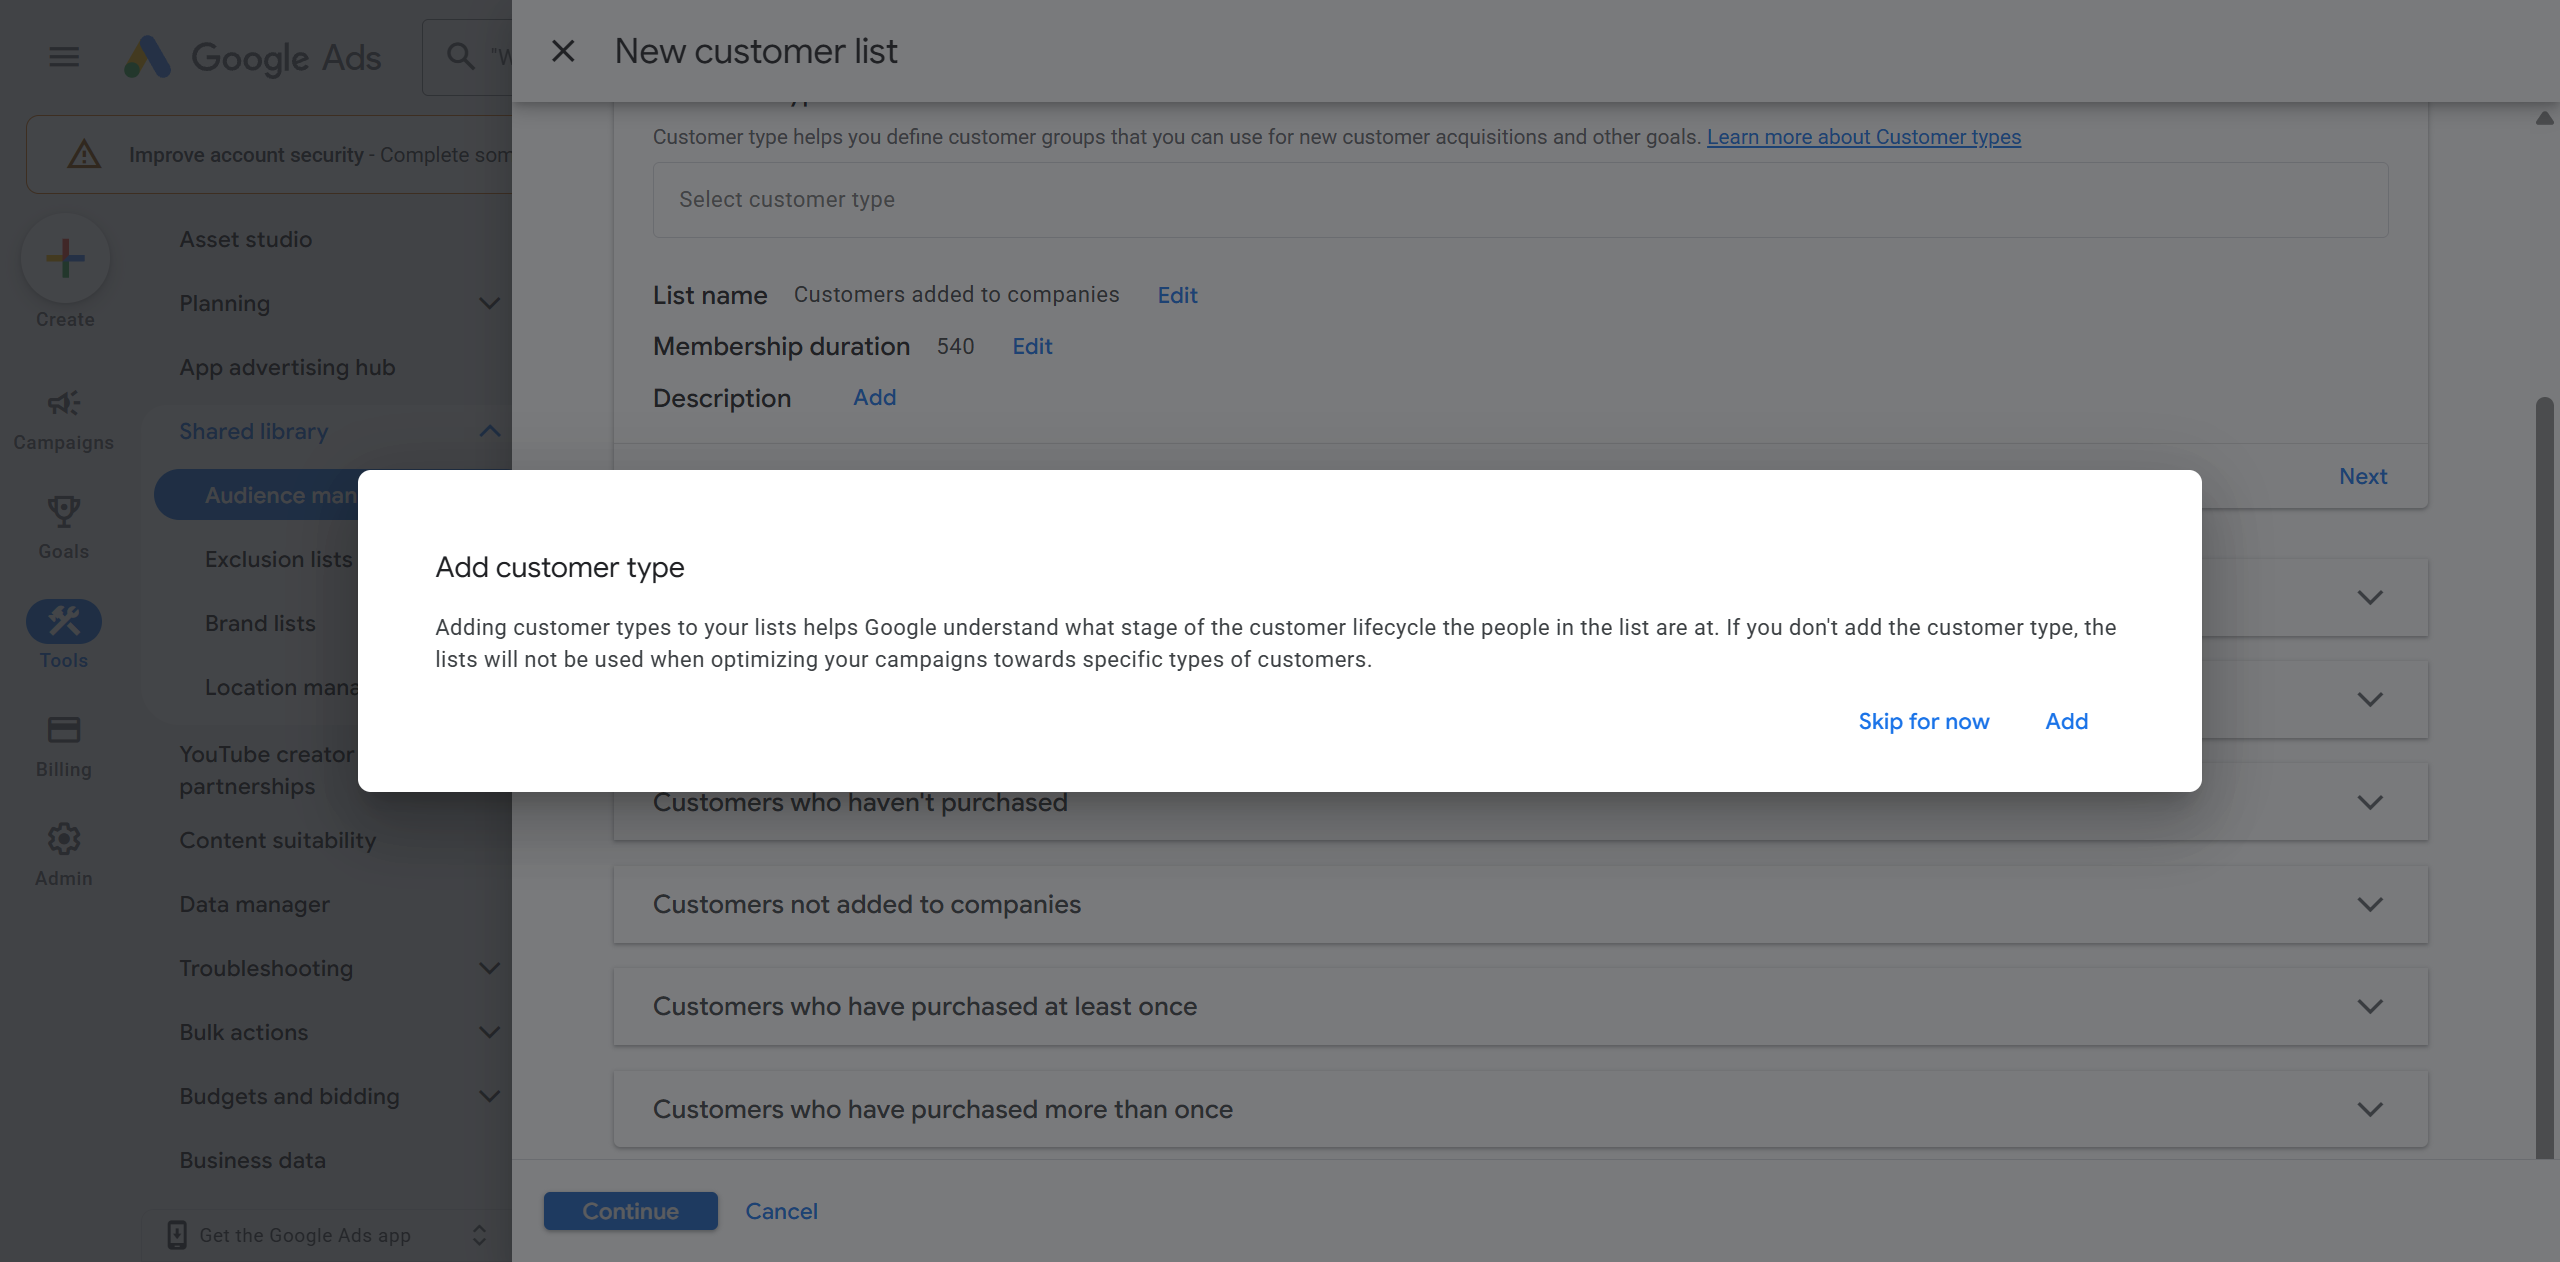
Google will prompt you to assign a customer type to each list — for example, "purchaser", "leads", "engaged". This is important: without it, the lists won't be used when optimising campaigns toward specific customer types.
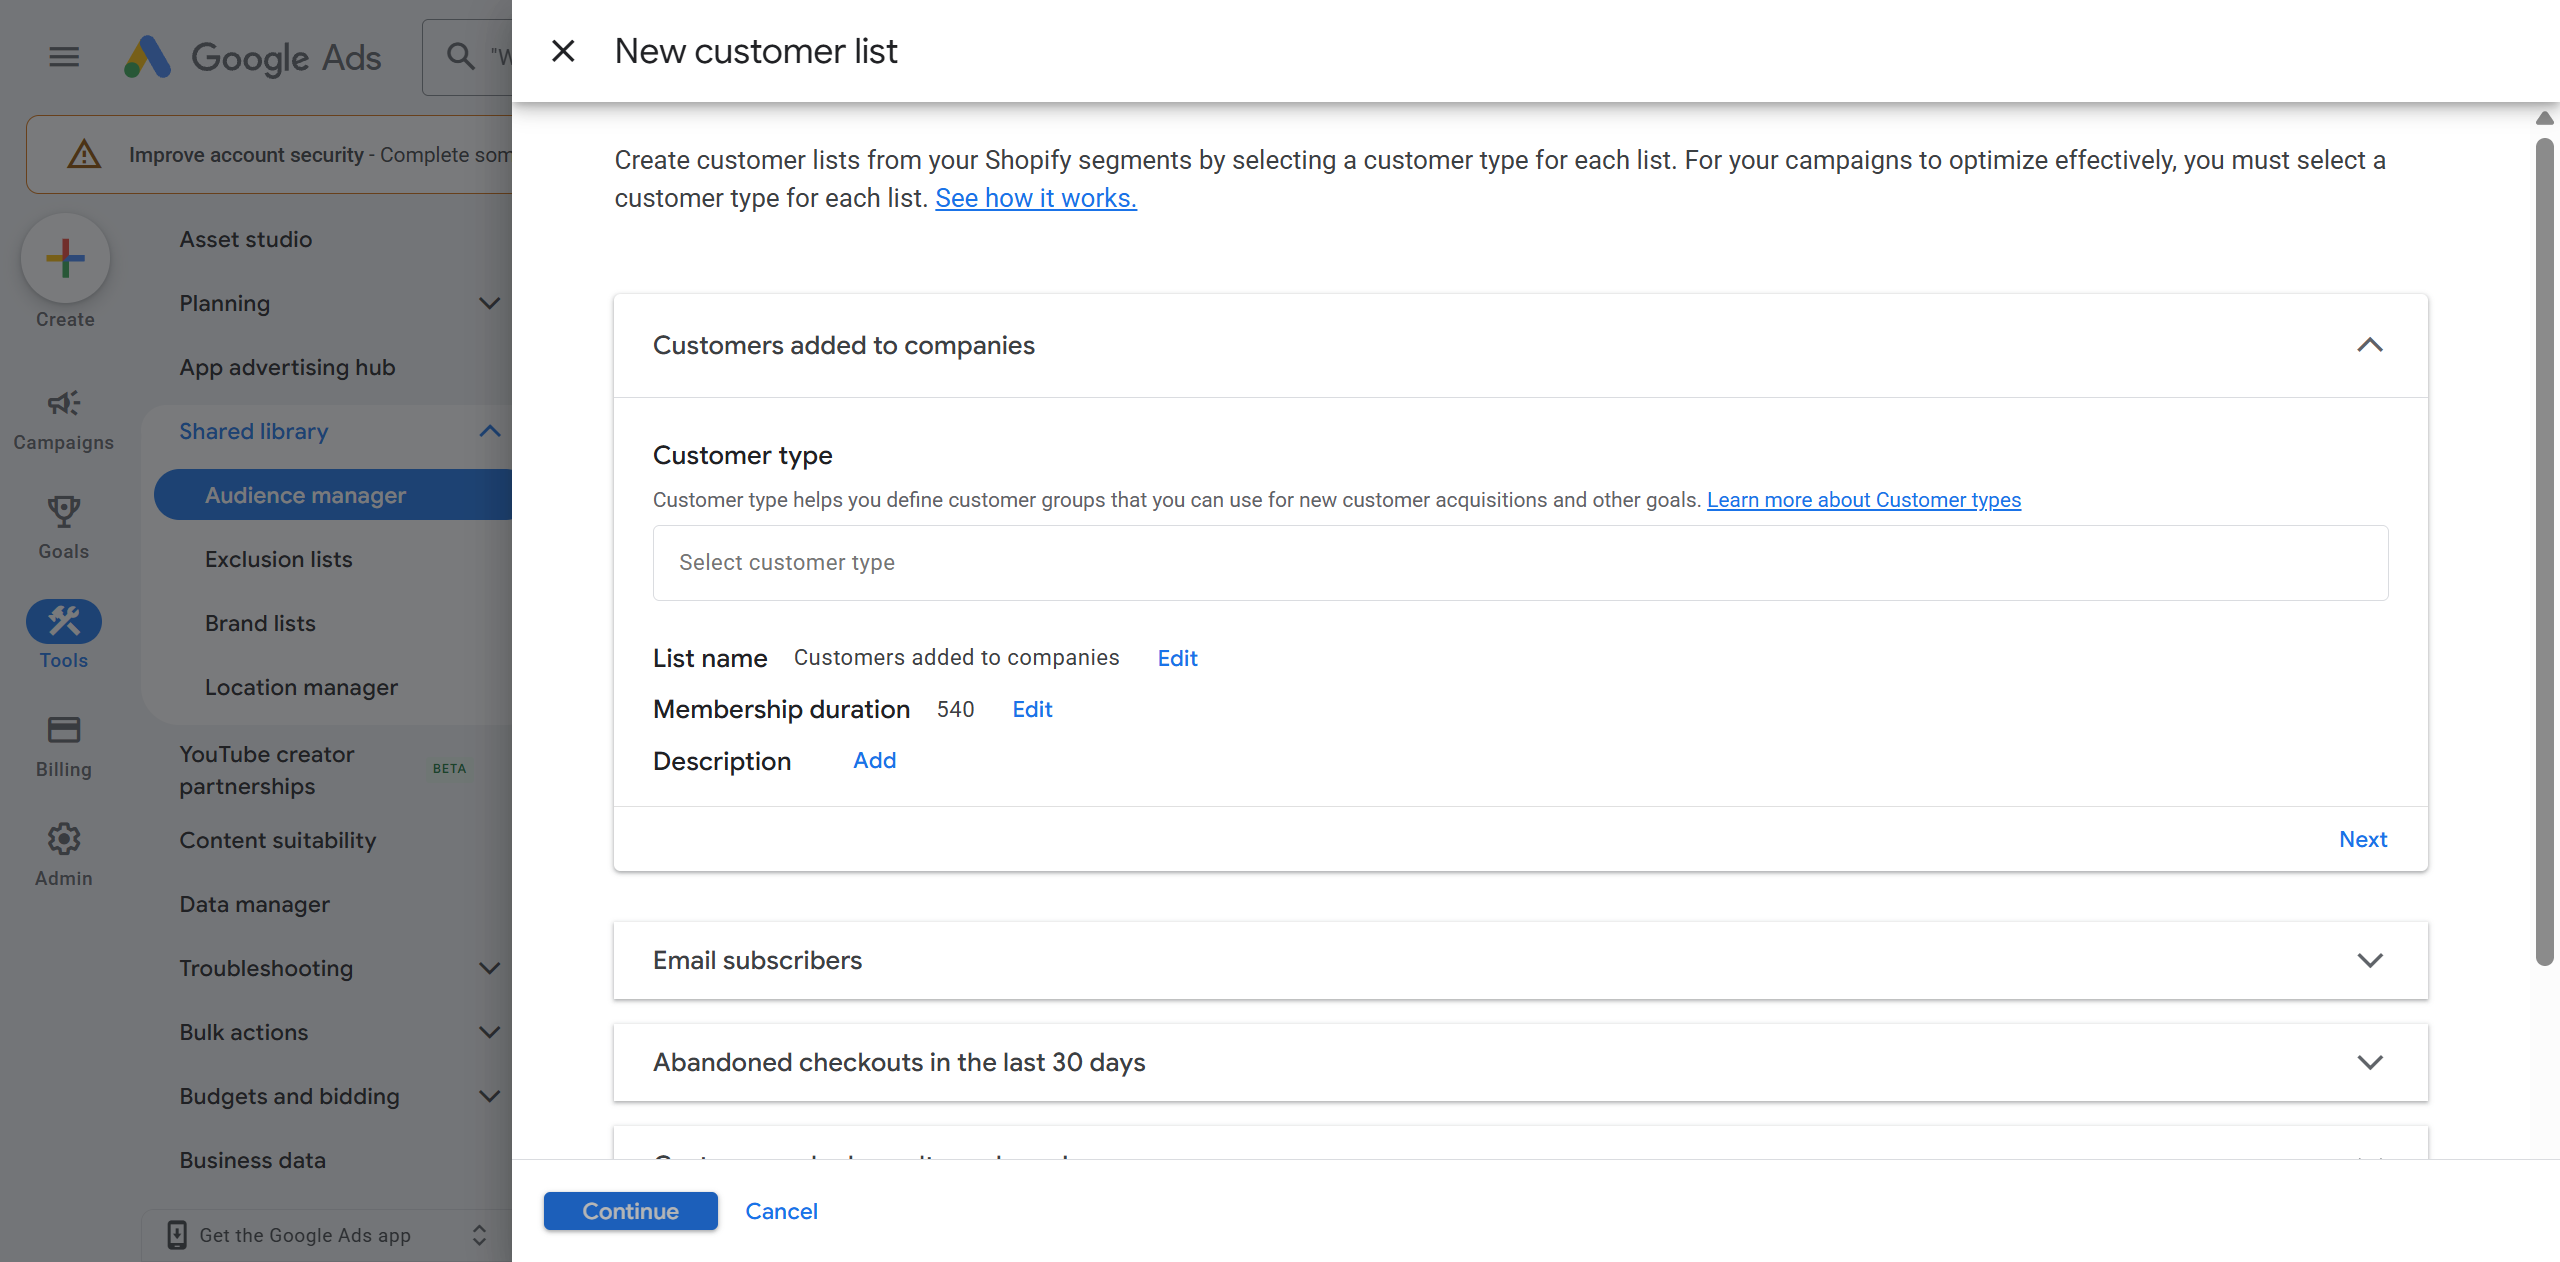
Don't skip this step. Click Add on the prompt and assign the right type to each segment.
Step 6 — Done
Google will confirm: "You've successfully created 7 customer lists." The lists will be available to use in targeting immediately, though matching customers to segments can take up to 24 hours.
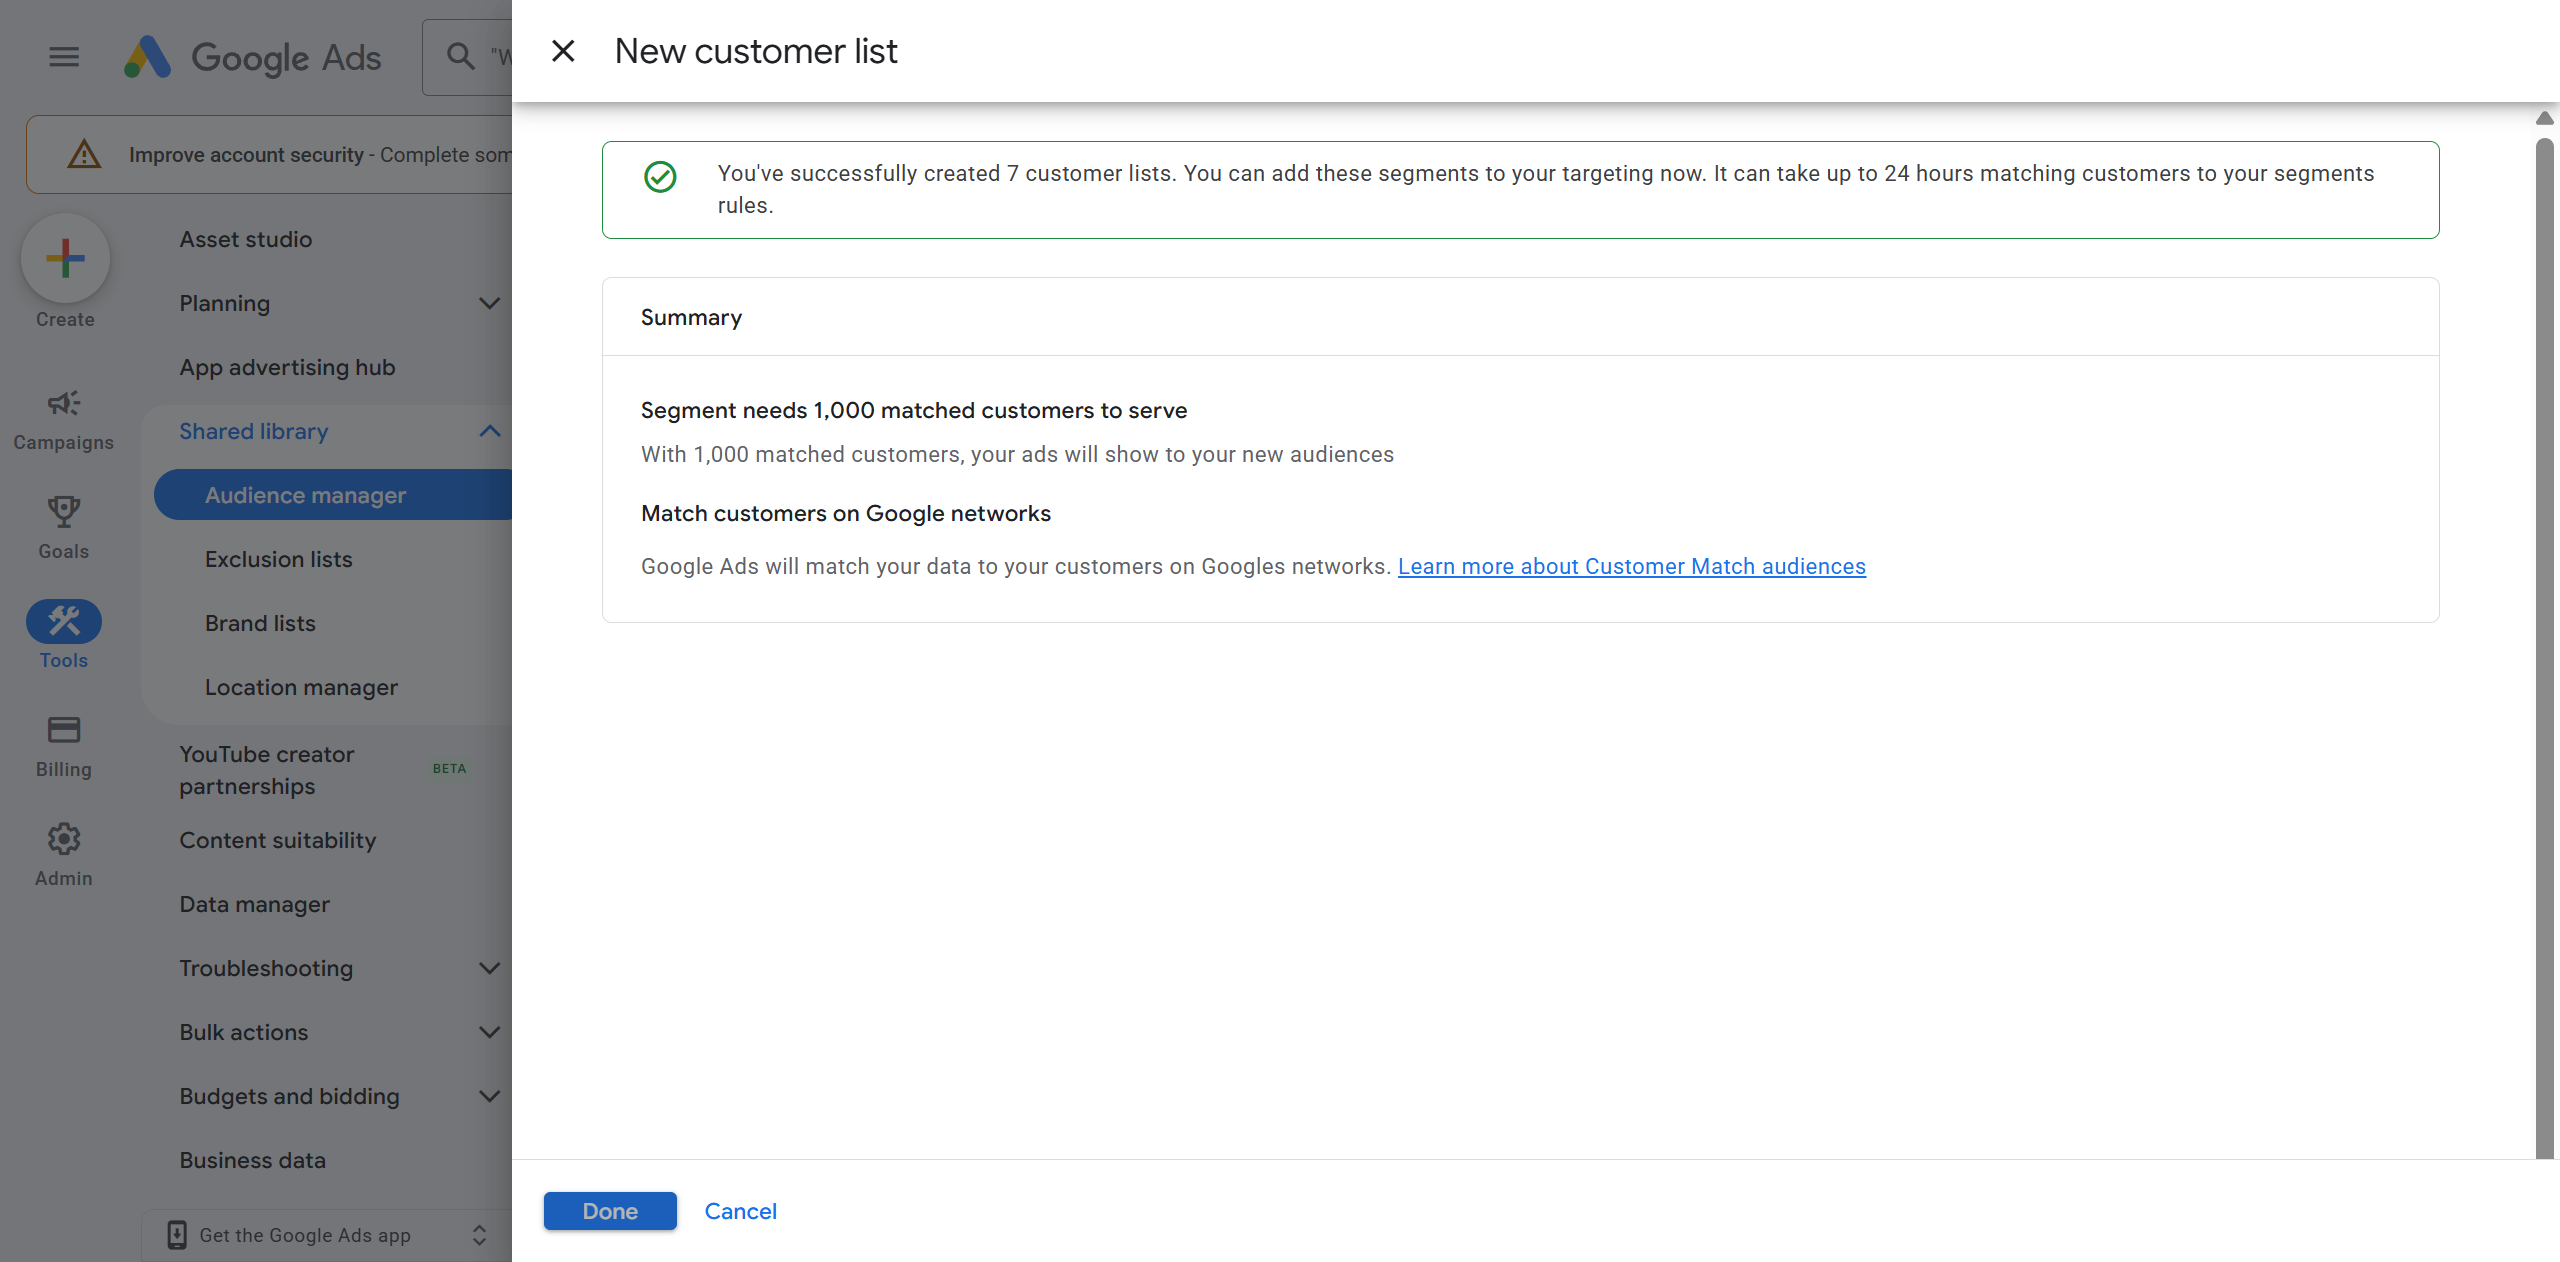
One thing to note: each segment needs at least 1,000 matched customers before ads will show to that audience. Smaller stores may find some lists don't activate — but they still work as passive Smart Bidding signals regardless of size.
This is not Shopify Audiences — and that matters
What this guide sets up is the Shopify → Google Customer Match integration — your own store's customer data sent directly to Google Ads. It works for any Shopify store, anywhere in the world.
This is different from Shopify Audiences, which is a separate app that uses purchase signals from across all Shopify stores to help you find new customers. Shopify Audiences is more powerful for prospecting — but as of 2026, it is only available to merchants on Shopify Plus in the United States and Canada with Shopify Payments enabled. Merchants outside the US and Canada cannot use Shopify Audiences at all.
If you're outside the US and Canada, the integration in this guide is the right approach — and it's genuinely effective for remarketing, exclusions, and PMax signals using your own first-party data.
What to do next
Once the lists are live in Google Ads:
- Add your purchaser list as an audience signal in any PMax asset groups — it's the strongest seed you can give the algorithm
- Add recent buyers as an exclusion on prospecting campaigns to stop wasting budget on people who just converted
- Check Audience Manager in Google Ads — you'll now see demographic and interest insights about your customer base even without spending a cent targeting them
The lists sync automatically. As new customers buy, they're added to the relevant segments. No manual uploads needed.
Connect Claude to your Shopify store
Install ShopMCP and Claude can edit your store in 2 minutes. No developer needed.
Install ShopMCP →